Supernova extension-chain
Supernova will be the first Zenon EVM based extension-chain. Pillars that want to participate in the extension-chain genesis must follow the instructions below.
- Based on Cronos codebase
- Full
EVMsupport xZNNused as native gas token- Transaction fees are burned according to
EIP-1559 ZNN→xZNNgas fee for redeemxZNN→ZNNgas fee + 1% swap fee distributed to extension-chain Pillars
Testnet Parameters
Chain-id: supernova_74506-1
Native coin: xZNN
Management token: stake (only used for Cosmos functionalities)
Tutorial
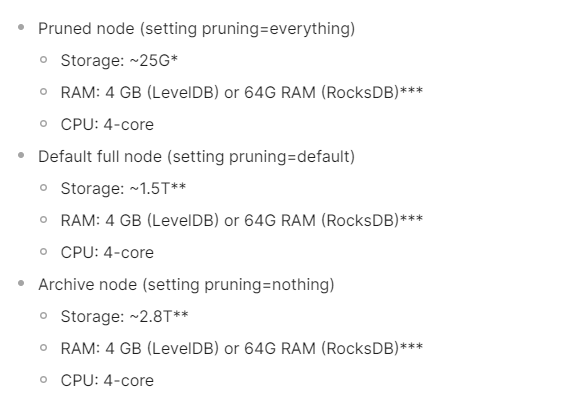
I recommend using Ubuntu 22.04 or latest Debian with >4vCPUs and >8GB RAM to run an extension-chain Pillar.
Root access is required. The Supernova directory is located at /root/.supernova
- Prepare the environment
sudo apt update && apt upgrade -y
sudo apt install build-essential jq ufw
sudo ufw enable
sudo ufw allow 26656/tcp  # Tendermint P2P
sudo ufw allow 26657/tcp  # Tendermint RPC
sudo ufw allow 1317/tcp   # Cosmos SDK REST API
sudo ufw allow 8545/tcp   # EVM HTTP RPC
sudo ufw allow 8546/tcp   # EVM WS RPC
sudo ufw reload
- Install Go
git clone https://github.com/udhos/update-golang
cd update-golang
sudo ./update-golang.sh
source /etc/profile.d/golang_path.sh
- Clone the repo
cd ~ && git clone https://github.com/alienc0der/supernova
- Build from source:
cd supernova
git pull
make build
- Add
supernovadtoPATH
echo 'export PATH=$PATH:/root/supernova/build' >> ~/.bashrc
source ~/.bashrc
- Initialize
supernovad. Replacepillar_monikerwith the name of your Pillar.
supernovad init pillar_moniker --chain-id supernova_74506-1
- Add
pillar_monikerkey
supernovad keys add pillar_moniker
- Mint
stakefor thepillar_monikeraccount
supernovad add-genesis-account pillar_moniker 1500000000000000000000stake
- Open Syrius desktop wallet, import your
producerkeystore from the Pillar’s machine and sign a message
Obtain the your own tendermint/PubKeyEd25519 using the following command:
cat ~/.supernova/config/priv_validator_key.json | jq -r '.pub_key.value'
Extract the tendermint/PubKeyEd25519 public key and sign the following message:
Supernova *insert tendermint/PubKeyEd25519*
Example message (use your own tendermint/PubKeyEd25519 extracted earlier using the cat command instead of the dummy “EmqJ95SK1AyKdTpauS9Fv7zmWrfIG+y+vX7h5vRQF9E=”:
Supernova EmqJ95SK1AyKdTpauS9Fv7zmWrfIG+y+vX7h5vRQF9E=
Copy the signature. You will need it in the next step.
- Issue
gentxcommand with the signature from the previous step
Please note that the last parameter is --details *insert signature*. Replace insert signature with the actual signature from the previous step.
supernovad gentx pillar_moniker 1000000000000000000000stake --chain-id supernova_74506-1 --moniker="pillar_moniker" --min-self-delegation="1000000" --details *insert signature* --ip="127.0.0.1"
If successful, you will get the following message in the terminal window:
Genesis transaction written to /root/.supernova/config/gentx/gentx-0x0x0x0x0x0x0x0x0x0x.json.
![]()
![]()
![]() Privacy warning: remove the “memo” field from the
Privacy warning: remove the “memo” field from the gentx that contains the public IP of the VPS instance where the validator will be hosted. For a secure operation of the extension-chain validator, please check Step 11.
-
Send me via DM the resulting
gentx-0x0x0x0x0x0x0x0x0x0x.json. Once there are more than 5 extension-chain Pillars, I will compile thegenesis.jsonand post it here. After that we can coordinate to unleash the Supernova. -
Setup a Sentry node for the extension-chain Pillar (optional, recommended)
Create a new VPS with similar specs. Follow Steps 1 - 5. After that, initialize the sentry node:
supernovad init sentry --chain-id supernova_74506-1
Navigate to the configuration directory and edit the config.toml file with the parameters from the tables below. Peers are identified by node_id@ip:port. In order to get the node_id, use the following command:
supernovad tendermint show-node-id
vim /root/.supernova/config/config.toml
Validator Node Configuration
| Config [p2p] | Setting |
|---|---|
| pex | false |
| persistent_peers | list of sentry_node_id@ip:port |
| private_peer_ids | none |
| unconditional_peer_ids | optionally list sentry_node_id@ip:port |
| addr_book_strict | false |
Sentry Node Configuration
| Config [p2p] | Setting |
|---|---|
| pex | true |
| persistent_peers | validator_node_id@ip:port, optionally list sentry_node_id@ip:port |
| private_peer_ids | validator_node_id |
| unconditional_peer_ids | validator_node_id@ip:port, optionally list sentry_node_id@ip:port |
| addr_book_strict | false |
- Enable EVM RPC endpoint for the Sentry node (optional)
SSH into your Sentry instance. Navigate to the configuration directory and edit the app.toml file with the parameters from the table below.
vim /root/.supernova/config/app.toml
| Config [json-rpc] | Setting |
|---|---|
| address | 0.0.0.0:8545 |
| ws-address | 0.0.0.0:8546 |
- Setup a seed node (optional)
Create a new VPS with similar specs. Follow Steps 1 - 5. After that, initialize the seed node:
supernovad init seed --chain-id supernova_74506-1
Navigate to the configuration directory and edit the config.toml file with the parameters from the table below.
Seed Node Configuration
| Config [p2p] | Setting |
|---|---|
| laddr | tcp://0.0.0.0:26656 |
| external_address | vps_instance_public_ip:26656 |
| seed_mode | true |
- Add Supernova seed nodes (kudos @0x3639 @tapwoot @coinselor)
Navigate to the configuration directory and edit the config.toml file with the following seed nodes:
seeds = "b91ab16e7454eeaabcb0d4c5d2f900a08ed518aa@5.196.22.239:26656,7efe3e47afbbf38c44179d3802aee4cad7af47eb@208.115.200.55:26656,7cd3cb605a8da6a7be20736c171ee33d307d6f88@3.94.70.251:26656"
- Setup a Systemd service (optional, recommended)
cp /root/supernova/build/supernovad /usr/local/bin/supernovad
sudo nano /etc/systemd/system/supernova.service
Assuming you’ve completed Step 5, paste the following configuration:
[Unit]
Description=supernova service
After=network.target
[Service]
LimitNOFILE=32768
User=root
Group=root
Type=simple
SuccessExitStatus=SIGKILL 9
ExecStart=/usr/local/bin/supernovad start
ExecStop=/usr/bin/pkill -9 supernovad
Restart=on-failure
TimeoutStopSec=10s
TimeoutStartSec=10s
[Install]
WantedBy=multi-user.target
Save and reload the configuration:
systemctl daemon-reload
Now please wait until the genesis.json contains all xchain Pillars that want to participate in the Gensis of the Supernova extension-chain.
After the final version of the genesis.json is uploaded on your machine, please start the supernovad service:
systemctl start supernova.service
![]()
![]()
![]() Please make sure you’re running the latest
Please make sure you’re running the latest supernovad binary ![]()
![]()
![]()
cd /root/supernova
git pull
make build
